What You’ll Need
Before we dive in, here’s a quick checklist of what you’ll need to build your lab:
- A modern computer with at least 8GB of RAM (16GB recommended)
- VMware Workstation Player (free for personal use)
- Kali Linux ISO (penetration testing OS)
- DVWA (Damn Vulnerable Web Application) as the target
- A stable internet connection (for downloading ISOs and tools)
Step 1: Install VMware Workstation Player
VMware is a free and reliable virtualization tool that allows you to run multiple operating systems on your computer without affecting your main system. It’s user-friendly, efficient, and widely used in the industry.
You can download the workstation from vmware official website itself: vmware workstation
After downloading VMware Workstation Player, install it like any regular software. Once installed, open the application and choose “Create a New Virtual Machine.” You’ll be prompted to select an ISO—this is where you’ll load Kali Linux for your attacker machine. Allocate around 2-4 CPU cores and 4-8GB RAM if your host system allows. Also, create a virtual disk of at least 20GB.
Using VMware ensures that your lab remains isolated from your main system, allowing you to test tools safely and without risk of damage.
Step 2: Set Up Kali Linux
Kali Linux is the go-to OS for penetration testers and ethical hackers. Once the virtual machine is created, power it on and follow the installation process for Kali. Choose Graphical Install, set up your time zone, hostname, and password. After installation, log in and run updates:
sudo apt update && sudo apt upgrade -y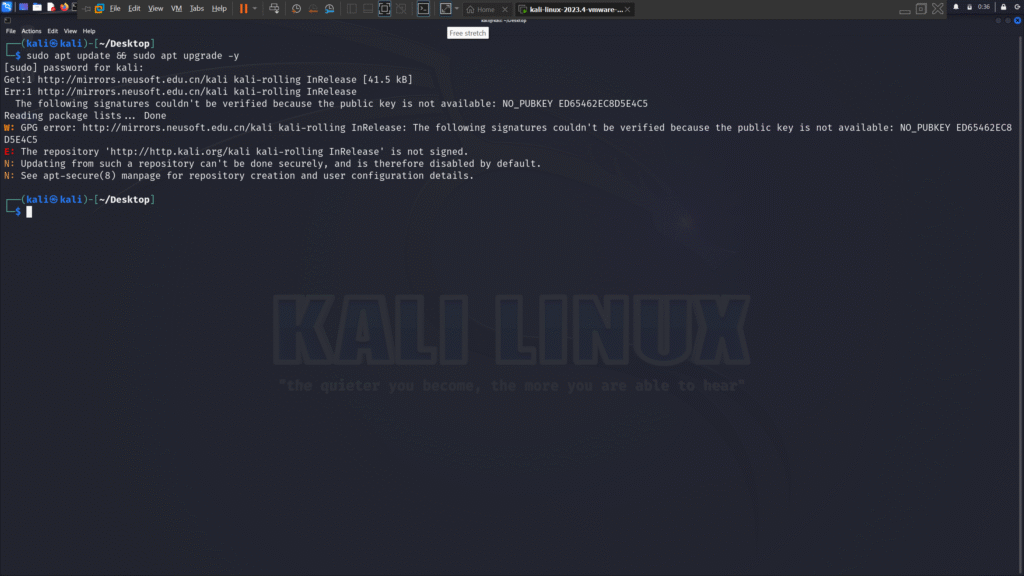
Kali comes pre-installed with most of the tools you’ll need—Nmap, Burp Suite, Metasploit, and more. You’ll also be using it as your attacker machine to simulate real-world attacks on vulnerable targets.
Make sure to install VMware Tools inside Kali for better performance and smoother user experience. This will also allow you to drag and drop files between host and guest.
Step 3: Add DVWA (Damn Vulnerable Web App)
DVWA is a PHP/MySQL web application designed to be vulnerable on purpose—perfect for practicing web application penetration testing. It’s lightweight, easy to set up, and simulates common vulnerabilities such as SQLi, XSS, and file inclusion.
You can either install DVWA on a separate virtual machine running Ubuntu/Debian or run it inside Kali using XAMPP. However, for better isolation and realism, it’s recommended to install it on a second VM.
Set up a new virtual machine with Ubuntu Server (allocate 2GB RAM and 1 CPU core). Once installed, follow these steps to install Apache, PHP, and MySQL:
sudo apt install apache2 mariadb-server php php-mysqli git -y
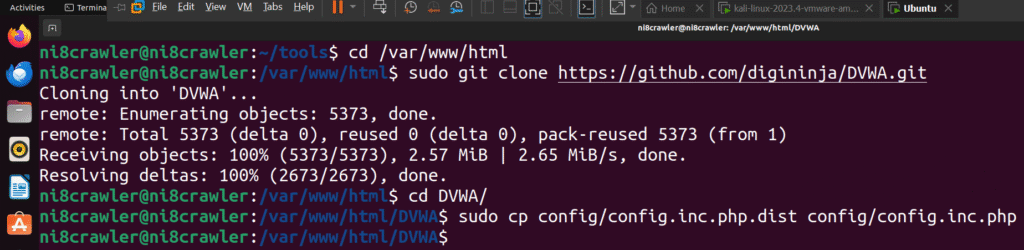
cd /var/www/html
sudo git clone https://github.com/digininja/DVWA.git
cd DVWA
sudo cp config/config.inc.php.dist config/config.inc.php
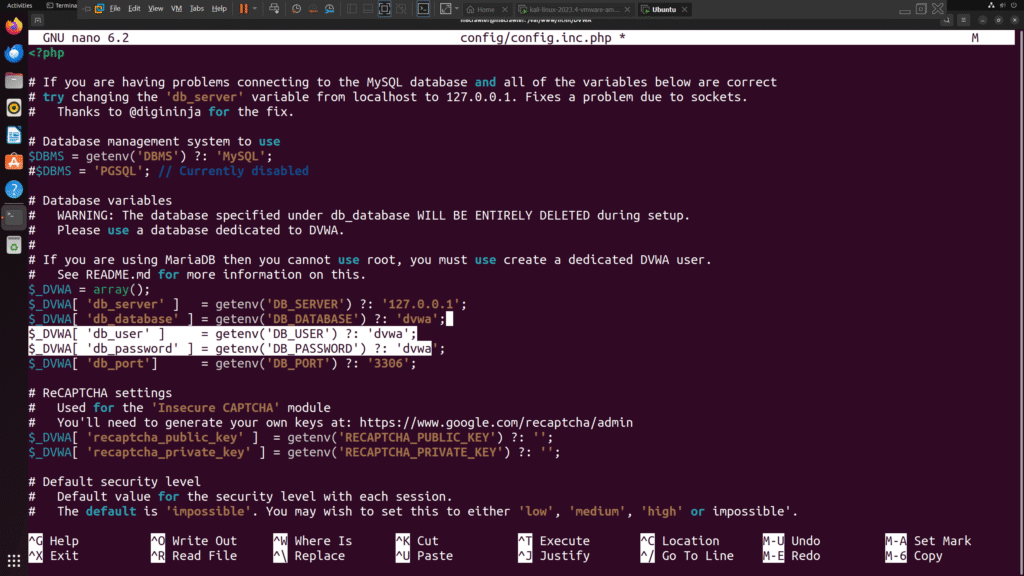
sudo nano config/config.inc.phpUpdate database username and password in the config file as needed. Then start your services:
sudo systemctl start apache2
sudo systemctl start mysql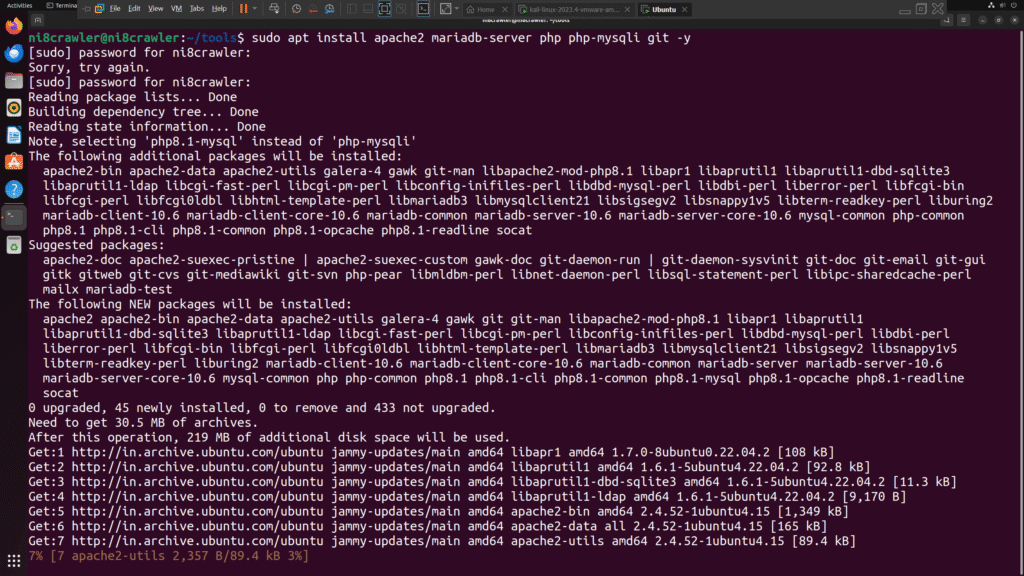
Visit the DVWA page via your browser using the VM’s IP address to finish the setup.
Step 4: Configure Your Network
To allow your Kali machine to interact with the DVWA machine, ensure both VMs are connected to the same Host-only or NAT network in VMware. This simulates a real-world local environment while keeping the traffic away from your actual network.
To test the setup, ping the DVWA machine from Kali:
ping 192.168.x.x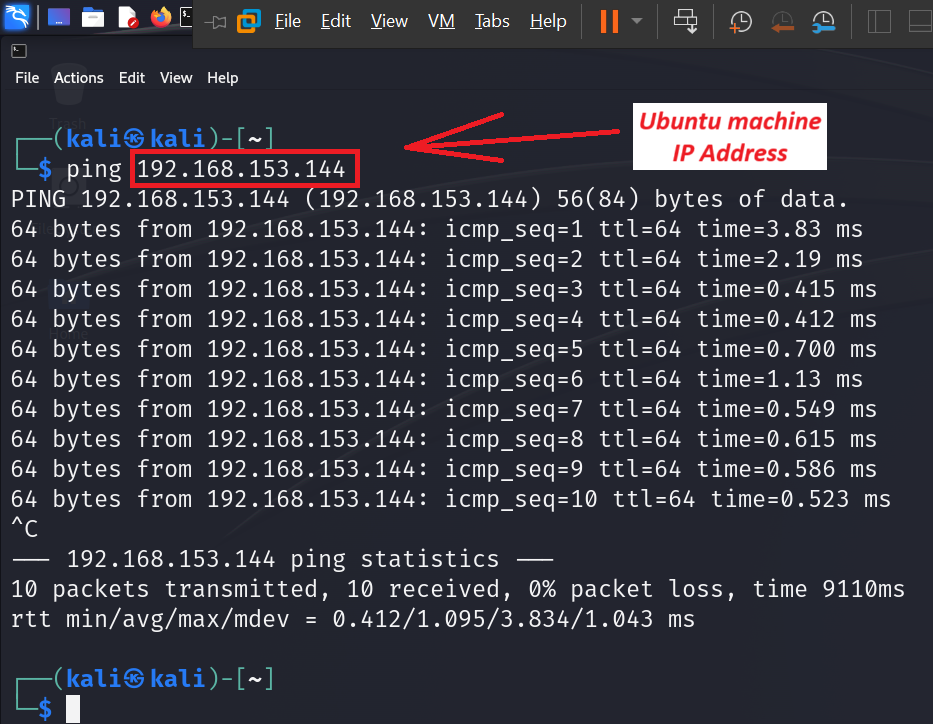
If successful, you’re ready to begin practicing attacks such as SQL injection, brute-force, command execution, and more.
Step 5: Perform Reconnaissance Using Nmap
Once your vulnerable target (DVWA) and attacker machine (Kali Linux) are up and running in VMware, it’s time to begin your first practical security test using Nmap — the go-to tool for network reconnaissance.
Why Nmap?
Nmap (Network Mapper) is a powerful open-source tool used for scanning networks and discovering hosts, services, and open ports. It’s essential in the early stages of penetration testing to gather intel before exploitation.
How to Use Nmap
Start by identifying the IP address of your DVWA machine (usually visible within your Linux terminal via ip a or ifconfig). Then, from your Kali VM, open a terminal and enter:
nmap -sV -O [target-ip]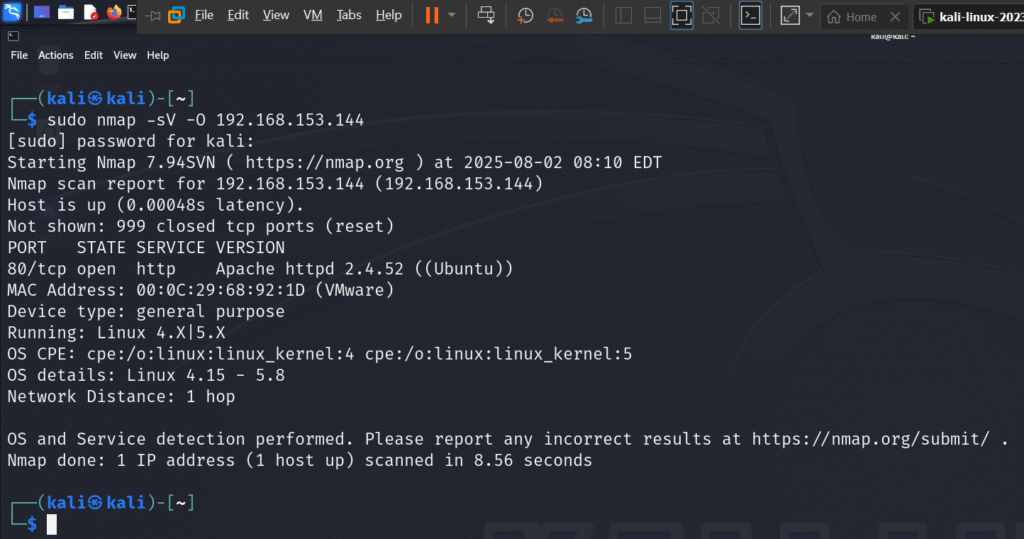
This command tells Nmap to:
- -sV: Detect service versions
- -O: Guess the operating system
You’ll get a clean list of open ports, running services, and OS details, which helps guide your next actions.
Practice Tip:
You can try different Nmap scan types like:
nmap -T4 -A -v [target-ip]
This performs an aggressive scan with more detailed output, ideal for testing in a local lab.
Nmap’s versatility makes it a perfect tool to build your foundational knowledge of network enumeration and vulnerability discovery. No internet? No problem. Your isolated lab environment is all you need.
🚀 Enjoyed This Guide?
If you found this tutorial helpful, check out more of our posts on ethical hacking, penetration testing, and building home labs.
🔐 Explore More Cybersecurity Posts